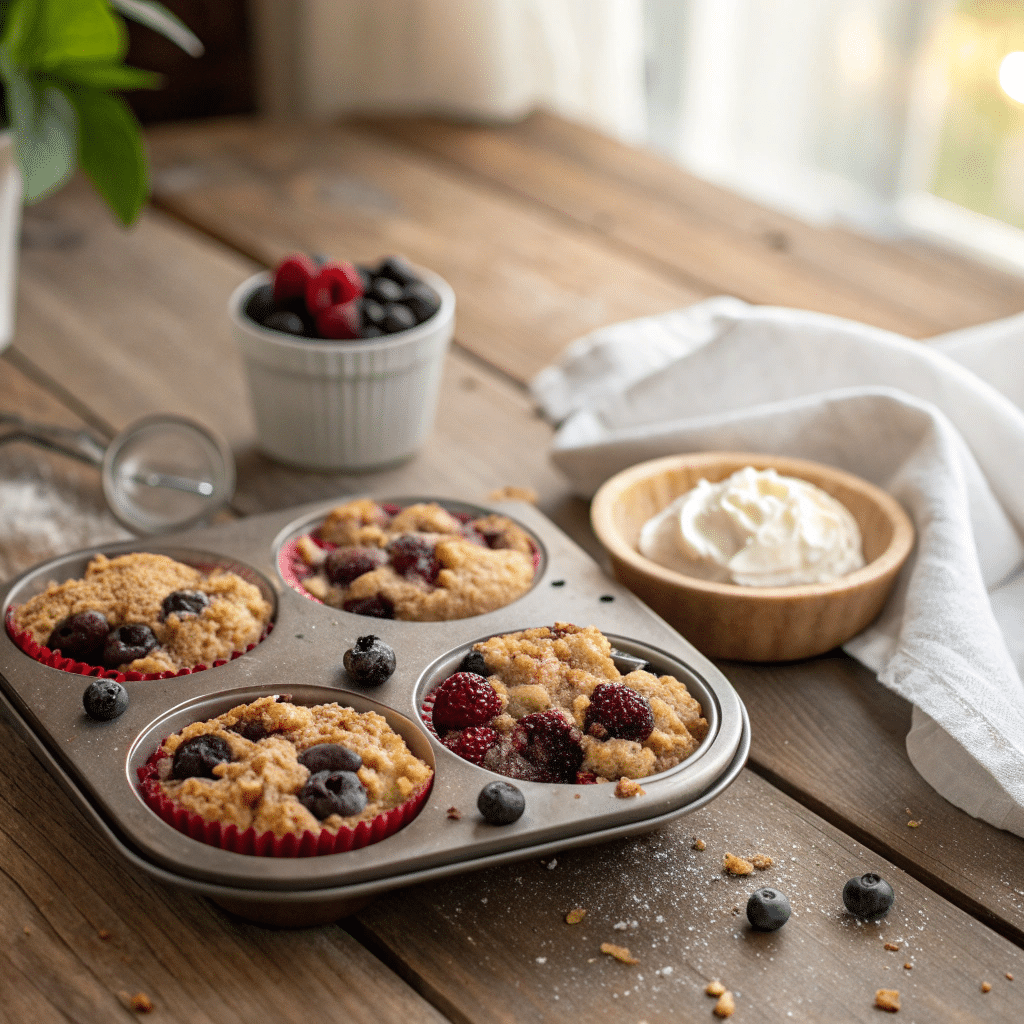
If you’ve ever craved a dessert that’s both fruity and indulgent but worry about gluten, let me introduce you to my gluten-free berry crumble cups. These little delights are perfect for breakfast, afternoon tea, or a light dessert that feels like a treat but doesn’t weigh you down.
The beauty of this recipe is how simple it is. No long prep times or confusing steps. You get a mixed berry dessert healthy enough to enjoy without guilt, yet indulgent enough to satisfy your sweet tooth.
Why You’ll Love These Gluten-Free Berry Crumble Cups
I have a confession: I’m a bit of a dessert snob. I love sweets that taste homemade and comforting, but I don’t always want the extra heaviness of traditional cobblers or crisps. That’s where these gluten free berry crumble cups come in.
- They’re single-serve, which means no fighting over the last piece.
- You can prep them ahead of time and bake when ready.
- They’re loaded with berries, so you’re sneaking in some antioxidants while enjoying a treat.
- The gluten free crumble topping is buttery, slightly crunchy, and melts perfectly over warm berries.
Trust me, once you try these, they might become your go-to for quick GF desserts.
Ingredients You’ll Need
Here’s a simple list for your gluten free berry crumble:
For the Berry Filling:
- 2 cups mixed berries (fresh or frozen – I love blueberries, raspberries, and blackberries)
- 2 tablespoons maple syrup or honey
- 1 teaspoon lemon juice
- 1 teaspoon cornstarch (for thickening)
For the Gluten-Free Crumble Topping:
- 1 cup almond flour
- ½ cup gluten-free rolled oats
- ⅓ cup brown sugar or coconut sugar
- ¼ teaspoon salt
- ½ teaspoon cinnamon
- ½ cup cold unsalted butter, cubed (or coconut oil for dairy-free)
That’s it! A handful of simple ingredients, most of which you probably already have in your pantry.
How to Make Gluten-Free Berry Crumble Cups
Follow these steps for a dessert that’s satisfying, simple, and full of flavor.
Step 1: Preheat and Prep
Start by preheating your oven to 350°F (175°C). Lightly grease a muffin tin or line with paper liners. This makes cleanup a breeze and keeps your gluten free berry crisp intact.
Step 2: Mix the Berries
In a bowl, toss your berries with maple syrup, lemon juice, and cornstarch. Make sure each berry is coated evenly. This prevents watery filling and gives a perfect, jammy texture when baked.
Step 3: Make the Crumble Topping
In another bowl, combine almond flour, oats, sugar, salt, and cinnamon. Cut in the cold butter using a pastry cutter or your fingers until the mixture resembles coarse crumbs. This is your GF crumble topping magic.
Step 4: Assemble the Cups
Spoon the berry mixture into each muffin liner, filling about two-thirds full. Then sprinkle the crumble topping generously over each cup. Don’t be shy—the topping is the best part.
Step 5: Bake to Perfection
Bake for 25–30 minutes, until the topping is golden and the berries are bubbling. The aroma alone will pull you into the kitchen like a magnet.
Step 6: Cool and Enjoy
Allow the cups to cool slightly before serving. They taste amazing warm, but a scoop of vanilla ice cream or a dollop of whipped cream takes them to another level.
Tips for the Best Gluten-Free Berry Crumble Cups
- Berry Choices Matter: I love a mix of blueberries, raspberries, and blackberries, but strawberries also work. Frozen berries are fine—they just release more juice.
- Make it Ahead: You can assemble the cups and freeze them unbaked. When ready, bake directly from frozen (add 5 extra minutes).
- Extra Crunch: Add chopped nuts to the crumble topping for texture. Walnuts or pecans work beautifully.
- Sweetener Swap: If you prefer less sugar, you can reduce maple syrup or sugar slightly. The berries are naturally sweet.
Variations You’ll Enjoy
- Mini Berry Cobbler Cups: Use larger muffin tins for a slightly more rustic cobbler feel.
- Dairy-Free Delight: Swap butter for coconut oil and enjoy a vegan-friendly dessert.
- Spiced Berry Crumble: Add nutmeg or cardamom to the topping for a cozy twist.
Serving Suggestions for Gluten-Free Berry Crumble Cups
These gluten free berry crumble cups are versatile. You can enjoy them straight from the oven, or get a little creative:
- Breakfast Treat: Serve with Greek yogurt for a sweet morning boost.
- Afternoon Snack: Pair with a cup of tea or coffee—perfect for a cozy break.
- Dessert Upgrade: Add a scoop of vanilla ice cream or coconut cream for an indulgent, yet light dessert.
- On-the-Go: Wrap in parchment paper for a quick, portable snack.
The cups are designed to be flexible—just like your sweet cravings.
Why This Recipe Works
I know you’ve seen berry desserts before, but this gluten free berry crisp stands out for a few reasons:
- Perfect Texture: The topping is crisp yet tender, giving a satisfying crunch against the soft berries.
- Balanced Sweetness: The natural sweetness of berries is enhanced, not masked, making it a healthier dessert option.
- Quick Prep: With minimal ingredients and simple steps, it’s one of the easiest quick GF desserts you’ll ever make.
- Single-Serve Convenience: No slicing, no fighting over portions—everyone gets their own cup.
It’s simple, straightforward, and yet, remarkably satisfying.
Gluten-Free Berry Crumble Cups
Ingredients
Method
- Preheat Oven: Heat oven to 350°F (175°C). Grease a muffin tin or line with paper liners.
- Prepare Berry Filling: Mix berries with maple syrup, lemon juice, and cornstarch in a bowl. Make sure all berries are coated.
- Make Crumble Topping: In another bowl, combine almond flour, oats, sugar, salt, and cinnamon. Cut in cold butter with a pastry cutter or fingers until mixture looks like coarse crumbs.
- Assemble Cups: Fill each muffin liner about two-thirds with berries. Sprinkle crumble topping evenly over each cup.
- Bake: Bake 25–30 minutes until topping is golden and berries are bubbling.
- Cool & Serve: Let cool slightly before serving. Optional: top with vanilla ice cream or whipped cream.
Notes
- You can use frozen berries—they work fine and will create a slightly more syrupy filling.
- For a dairy-free version, swap butter with coconut oil.
- The topping can be mixed ahead of time and stored in the fridge for up to a week.
- If serving for breakfast, pair with Greek yogurt for a lighter option.
Common Questions About Gluten-Free Berry Crumble Cups
1. Can I use frozen berries?
Absolutely! Frozen berries work great. They may release a little more juice while baking, which actually creates a beautiful syrupy filling for your gluten free berry crumble recipe.
2. Can I make the crumble topping ahead of time?
Yes! You can mix the topping and store it in the fridge for up to a week. When ready, just sprinkle over the berries and bake. This makes it a perfect GF crumble topping for spontaneous baking.
3. How do I store leftover cups?
Store in an airtight container in the fridge for up to 4 days. Reheat in the oven for a few minutes to bring back the fresh-baked aroma.
4. Are these suitable for a dairy-free diet?
Yes! Swap butter for coconut oil to create a delicious dairy-free version of this gluten free berry cobbler. The texture is slightly different but still amazing.
5. Can I use other flours?
You can experiment with oat flour or a gluten-free flour blend, but I find almond flour gives the GF crumble topping the best texture—light, nutty, and slightly crunchy.
6. How do I make this recipe healthier?
Reduce the sugar slightly or use maple syrup instead of brown sugar. Berries provide natural sweetness, so you won’t lose any flavor. This turns your dessert into a mixed berry dessert healthy enough to enjoy more often.
7. Can I double the recipe?
Yes! Use a standard muffin tin or mini loaf pans. Adjust baking time slightly—larger portions may need a few extra minutes. This is perfect if you’re serving a crowd or prepping for the week.
Final Thoughts
These gluten-free berry crumble cups are more than just a dessert—they’re a celebration of simple, wholesome ingredients and the joy of baking. The combination of juicy berries and crunchy, buttery topping is comforting and satisfying.
Whether you’re craving a quick snack, a cozy dessert, or a breakfast treat, these cups are an easy, delicious solution. Plus, they’re flexible enough to adapt to your taste: swap berries, add nuts, or try dairy-free variations.
If you love mixed berry crisp or gluten free berry crisp, this recipe will quickly become a staple. It’s approachable, playful, and just sweet enough to bring a smile to anyone’s face.
So, preheat that oven and grab your berries—it’s time to enjoy a dessert that feels homemade, cozy, and a little bit indulgent, without the gluten.