Jump to Recipe
I’ll be honest, this recipe started as a clean-out-the-fridge move. A can of chickpeas, a bunch of kale that needed to go, half a lemon on the counter.
What came out of the pan stopped me. The olive oil isn’t just a cooking medium here. It becomes the sauce. The chickpeas absorb it, the greens get silky, and the whole thing tastes like you planned it.
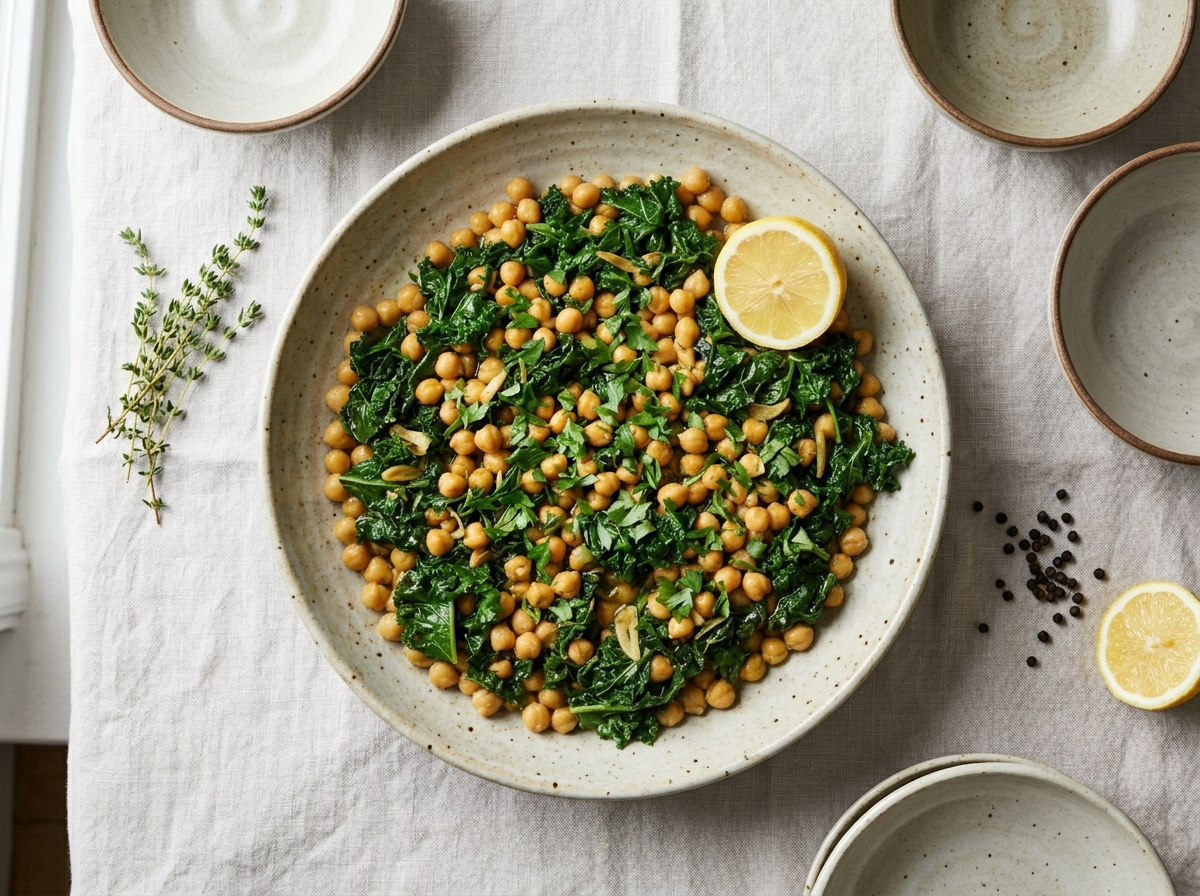
It’s soft. Brothy. Faintly smoky from the paprika. You can eat it from a bowl with bread, or spoon it over grains. Both are good.
This sits right in your weeknight rotation because it takes 40 minutes, uses pantry staples, and reheats even better the next day, much like this spiced pumpkin and chickpea tagine that follows the same one-pot logic.
Why You’ll Love This Recipe
- One pot means almost no cleanup after dinner
- Pantry staples you probably already have
- Protein and greens in a single satisfying bowl
- Leftovers taste even better the next day
Ingredient Notes
- Chickpeas: Canned chickpeas work perfectly here. If you use dried, cook them first until just tender so they don’t fall apart during braising.
- Olive Oil: Use a good extra-virgin olive oil. You’re using a full quarter cup, and the oil is doing real flavor work, so a decent bottle matters.
- Kale or Chard: Lacinato kale is my first pick because it stays a little toothsome. Chard wilts faster and is milder. Spinach works but goes very soft.
- Smoked Paprika: Smoked paprika gives the braise its subtle depth. Regular sweet paprika is fine, just a different flavor note.
- Garlic: Five cloves sounds like a lot but they mellow out completely in the oil. Don’t skip or reduce them.
- Lemon: Both zest and juice go in at the end. The zest keeps the brightness from getting lost in the rich oil.
- Vegetable Broth: Low-sodium broth lets you control the salt. Water with a pinch of salt also works in a pinch.
- Red Pepper Flakes: Optional but recommended. Even a small pinch gives the dish a gentle heat that balances the richness of the oil.
Olive Oil Braised Chickpeas and Greens
Ingredients
Method
- Drain the chickpeas in a colander, rinse under cold water, then spread them on a clean kitchen towel and pat dry. Removing surface moisture helps them pick up a little color in the oil.
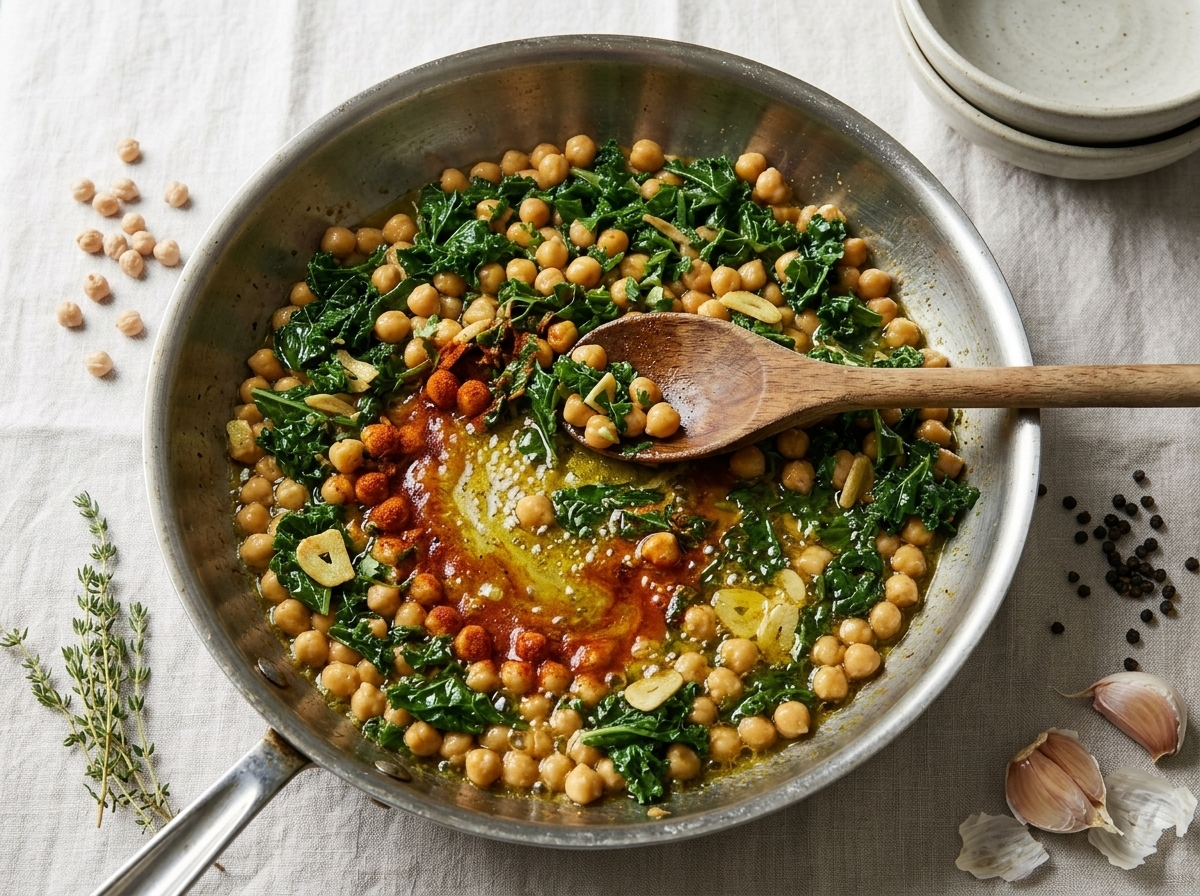
- Pour the olive oil into a 12-inch heavy-bottomed skillet over medium heat. Once the oil shimmers, add the sliced garlic and red pepper flakes. Cook for 1 to 2 minutes, stirring often, until the garlic turns pale gold and fragrant. Don’t let it brown.
- Add the smoked paprika and stir for 30 seconds until it blooms in the oil and the pan smells smoky and warm.
- Add the dried chickpeas in a single layer. Cook undisturbed for 3 minutes, then stir and cook another 2 minutes. Some chickpeas should have a slightly golden edge.
- Pour in the vegetable broth, add 1/2 tsp of the salt, and reduce the heat to medium-low. Let the chickpeas braise, uncovered, for 12 to 15 minutes, stirring occasionally, until the broth reduces by about half and the oil and liquid start to look like a loose, glossy sauce.
- Add the chopped kale in two batches, stirring after each addition, until the leaves begin to wilt and turn deep green. This takes about 4 to 5 minutes total.
- Remove the pan from heat. Add the lemon zest, lemon juice, remaining salt, and black pepper. Stir everything together.
- Let the braise rest off the heat for 5 minutes. Taste and adjust salt. Drizzle with a little extra olive oil and scatter over the parsley if using. Serve straight from the pan with crusty bread.
Notes
Tips for Success
- Pat chickpeas dry before adding them to the pan so they brown slightly instead of steaming.
- Keep the heat low while braising. Medium-low holds the oil at a gentle simmer and prevents bitterness.
- Add greens in two batches so the pan doesn’t overflow. The first batch wilts quickly and makes room.
- Taste and adjust salt only after adding lemon juice. The acid changes how salty the dish reads.
- Let the finished braise sit off the heat for five minutes before serving. The flavors tighten up noticeably.
Variations
- Add a 400 g can of crushed tomatoes with the broth for a heartier, more saucy braise.
- Stir in a spoonful of harissa paste with the garlic for a North African-leaning version.
- Top each bowl with a poached egg for extra protein and a richer finish.
Storage and Reheating
Store leftovers in an airtight container in the fridge for up to 4 days. The chickpeas absorb more oil overnight and the flavor deepens, so this is genuinely a good leftover dish.
Reheat gently on the stovetop over medium-low heat with a splash of water or broth to loosen things up. Avoid high heat, which can make the greens turn army-green and the chickpeas mushy.
This dish also freezes well for up to 2 months. Freeze in individual portions, thaw overnight in the fridge, and reheat as above.
Serving Suggestions
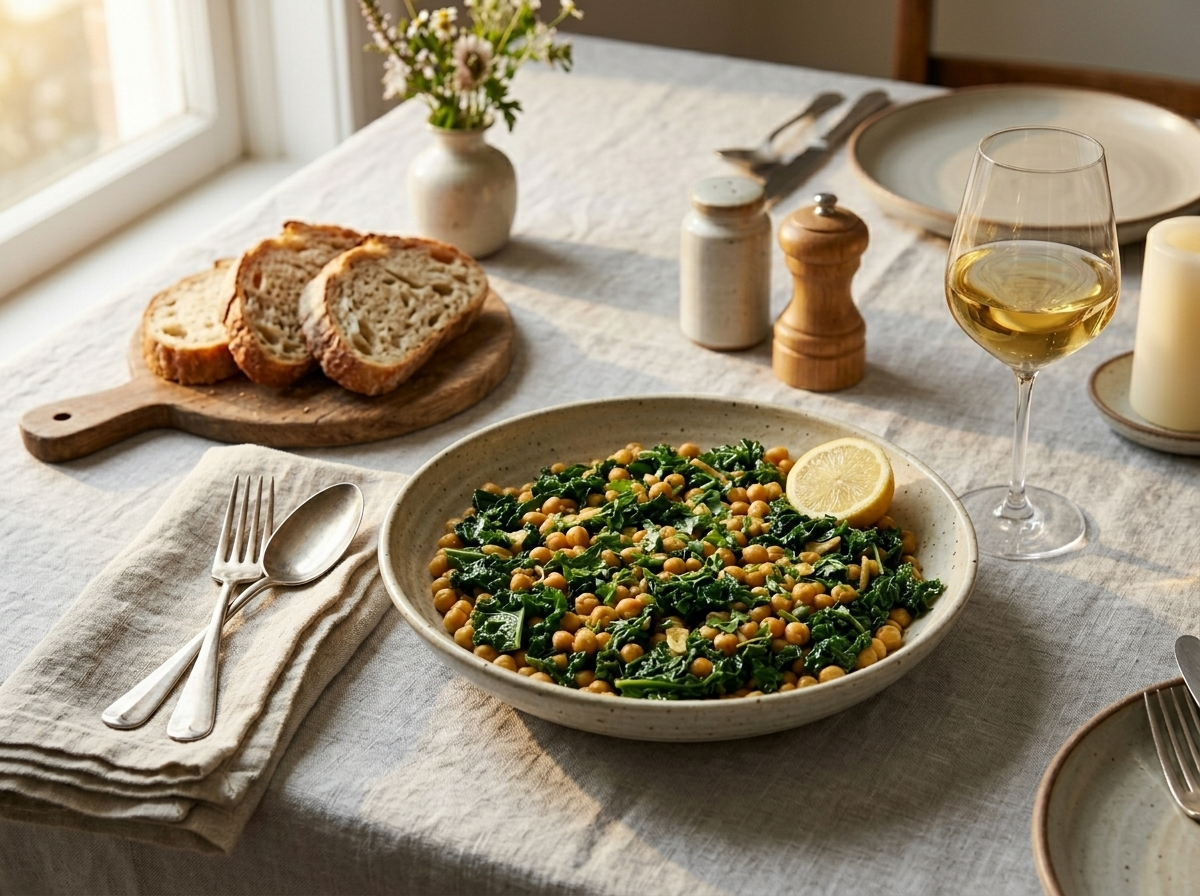
Serve it in a wide bowl with thick slices of crusty bread to mop up the oil. That’s the most honest way to eat it.
It also works spooned over farro, freekeh, or plain white rice if you want something more substantial. A dollop of plain yogurt on top adds a cool, creamy contrast to the warm oil, much like the cucumber dill Greek yogurt approach works against warm ingredients.
For a simple spread, put the braise on a platter with crumbled feta, a drizzle of extra olive oil, and lemon wedges on the side. It holds up at room temperature for about 30 minutes, which makes it useful for casual gatherings.
FAQ
Why are my braised chickpeas turning mushy instead of holding their shape?
This usually happens when the heat is too high or the chickpeas cook too long after the greens go in. Keep the braise at a gentle simmer and pull the pan off the heat as soon as the greens are just wilted.
Can I use frozen spinach instead of fresh kale in this recipe?
You can, but thaw and squeeze it very dry first or it will water down the braise. Fresh kale or chard holds up much better in texture and gives you more bite.
Can I make olive oil braised chickpeas ahead and reheat for meal prep?
Yes, and they’re actually better on day two after the chickpeas have soaked up the oil overnight. Reheat in a skillet over medium-low with a splash of broth and it comes back together in five minutes.
What bread pairs best with olive oil braised chickpeas and greens?
A thick-crusted sourdough or a flatbread like pita works best because you want something sturdy enough to scoop up the oil. Soft sandwich bread goes soggy too fast.
Is this braised chickpea recipe gluten-free?
Yes, every ingredient in the base recipe is naturally gluten-free. Just double-check your broth label since some vegetable broths contain small amounts of gluten from additives.
What’s the difference between braised chickpeas and a chickpea stew?
Braised chickpeas cook in a smaller amount of fat and liquid at low heat, so they stay distinct and pick up the flavor of the oil rather than floating in a thin broth. A stew typically has more liquid and a soupier consistency.